
When faced with a comprehensive program like FreeCAD to learn how to draw in two dimensions, it can seem very complex due to the numerous options presented. However, to start drawing, you don’t need so many options, and that is what you will learn in this blog entry.
STEP 1. Installation
Since I typically document for Debian, and this distribution prioritizes stability over innovation, and knowing that FreeCAD has improved significantly from version 1.0 onwards, let’s see how to install the latest version with flatpak packaging.
sudo apt update
sudo apt install flatpak
sudo flatpak install https://dl.flathub.org/repo/appstream/org.freecad.FreeCAD.flatpakref -y
STEP 2. Configure Windows and Keyboard Shortcuts
The following script is designed to customize the flatpak-packaged version of FreeCAD. If you install FreeCAD natively, you will need to modify the destination folder of the user.cfg file.
Download the following file using the keyboard shortcut Ctrl + S to save it:
Give it execution permissions and finally run it:
cd Downloads
chmod +x restaurar_freecad.sh
./restaurar_freecad.sh
Close FreeCAD and reopen it.
STEP 3. Let’s Start Drawing!
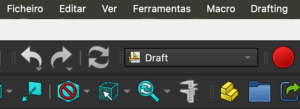
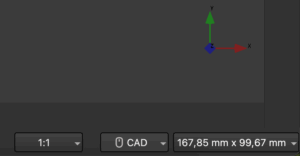
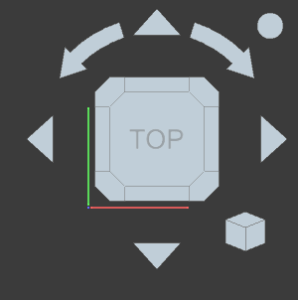
The first thing you should check on the main screen is that you are in Draft mode, CAD, and in top view. Here are the 5 minimal instructions to begin:
INSTRUCTION NO.1. LINE (Key L)
By pressing the letter L on the keyboard, a box appears on the left indicating that we are in line order. To draw:
- Click with the mouse at the starting point.
- For horizontal/vertical lines, hold Shift and enter the length.
- In the left panel, activate the “Relative” option.
To delete lines:
- Select the line and press Delete.
- For multiple lines: Ctrl + E and then Delete.
If the screen turns black, go to: Edit > Preferences > Display > 3D View and enable “MSAA 4x”.
Also, activate coordinate forcing (osnap), for example, endpoint and intersection:
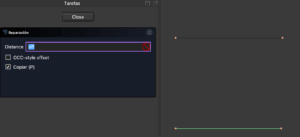
INSTRUCTION NO.2. OFFSET (Key Q)
By pressing Q, you can create a parallel line to another. In the right panel, make sure to have the “Copy” check activated. It may also be named Equidistant.
INSTRUCTION NO.3. TRIM (Key R)
Allows trimming or extending lines:
- Select the line to modify.
- Press R.
- Click on the boundary line.
In Debian, if you want to remove the longer section, press Ctrl + Alt before selecting.
INSTRUCTION NO.4. MOVE (Key D)
To copy already drawn elements:
- Select the lines with Ctrl + E.
- Press D.
- Click on the origin point and then on the destination.
Ensure the “Copy” check is activated.
INSTRUCTION NO.5. ROTATE (Key X)
To rotate a piece:
- Select with the shortcut Ctrl + E.
- Press the “Rotate” button.
- Define two points for the axis, and a third for the new position.
Uncheck the “Copy” if you don’t want to duplicate the piece.
There are many more instructions, but the goal of this guide is to start drawing without information overload. Once you master these tools, you can add more resources like blocks, layers, polylines, dimensions, etc.