
Import Students and Course Creation
Now that we have the initial necessary data — the student list and the file with our teaching sessions — the magic begins!
Click on the 02. Import Students button.

Import Students and Course Creation
Generally, in step 1 you shouldn’t need to do anything. The script should automatically capture the workspace, meaning the folder where you want to save the information. In case of any errors, the application provides a button to manually select it.
In step 2, select the language model (LLM) of your choice. By default, Groq, a very fast LLM, is selected. However, sometimes it might not work properly, and the script may not generate the course folders correctly. If this happens, try another LLM: Gemini, ChatGPT, etc.
A question that might arise is whether the script sends the student data to artificial intelligence. The answer is negative. In fact, you can verify this yourself by uploading the script to an artificial intelligence and asking what data is sent, analyzing the code.
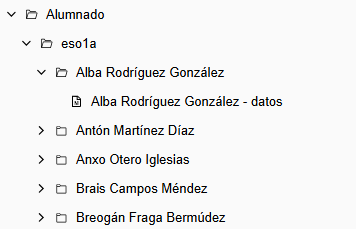
In step 3, select the student file, which is the .ods or .csv file provided by the administrative team or the one you created manually. Once selected, the program creates the groups, a folder for each student, and a note with their basic information (remember that the file I offer and the data shown in this manual are fictional). If you expand the data tree, the result will look something like this:
And the data note for each student looks like this:
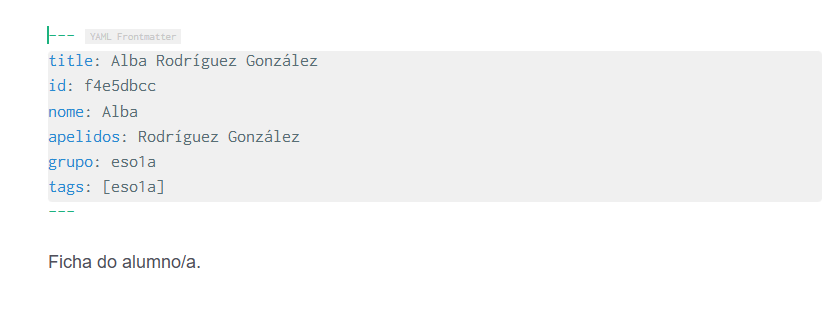
Each teacher can add any information they deem appropriate to that note. Moreover, more notes can be created manually to keep the information well-organized.
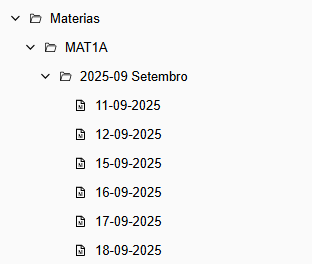
In step 4, by selecting the file schedule.txt (see step 6), you will get a list of the subjects that appear on your schedule. To the right of each subject, there will be a button with the text “Process Subject”.
By clicking that button, a new folder will be created for each subject. Inside this, there will be a subfolder for each month of the academic year. Within each monthly folder, the program will create a file for each class session, according to the official teaching calendar of Galicia for the 2025-2026 academic year and the schedule you selected.
And opening a specific session, we see the following:
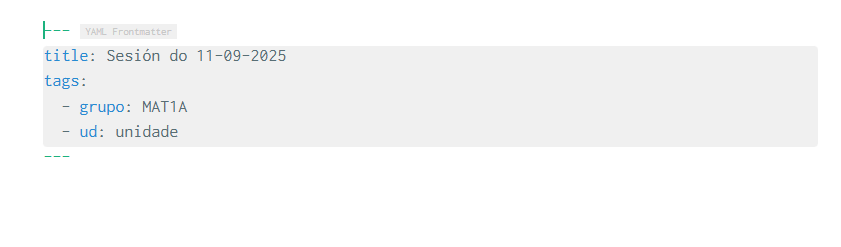
These notes will serve as a classroom diary. In the header, where it says “ud:”, you will enter the teaching unit you worked on during the session.
Later, we will see how to filter the information from this diary, both by date and by teaching unit.