
To use the applications I am publishing for free, a Gemini API Key is required. It is a free key. Let’s see how to obtain it:
-
Open google.es and log in with your Gmail credentials.
-
Go to the following page: aistudio.google.com/api-keys.
-
Click on the “Create API Key” button.
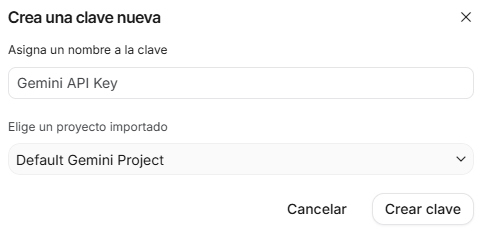
4. In the next window, leave everything as default, without changing anything, and click on Create key again.
 5. Click on the copy button.

6. And then paste it into the API configuration window.

With the help of AI, I’ve developed a small application that can be useful for both teachers and students. It is a tool for studying the syntax of sentences, both simple and complex, in Galician, Spanish, and Latin. However, if you’re interested in another language or would like to improve or expand the analysis, you can contact me to implement it (piztu@omeu.gal).
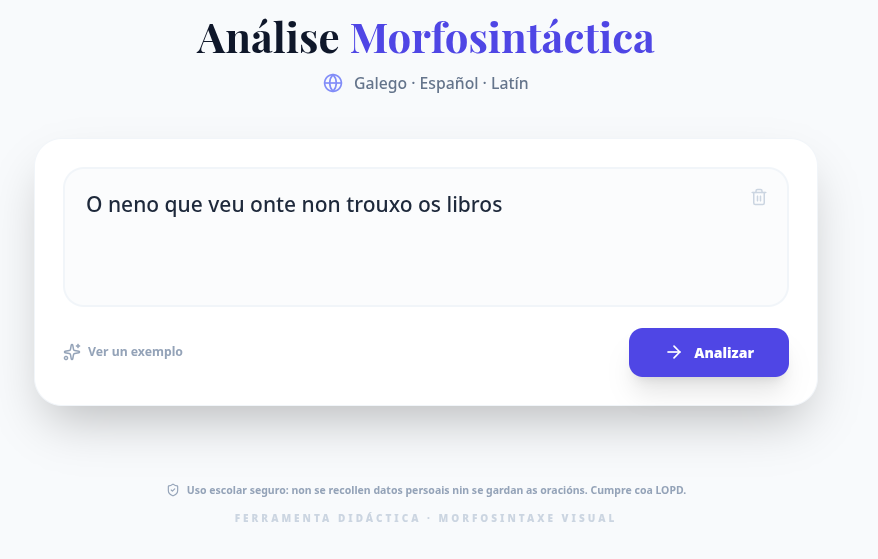
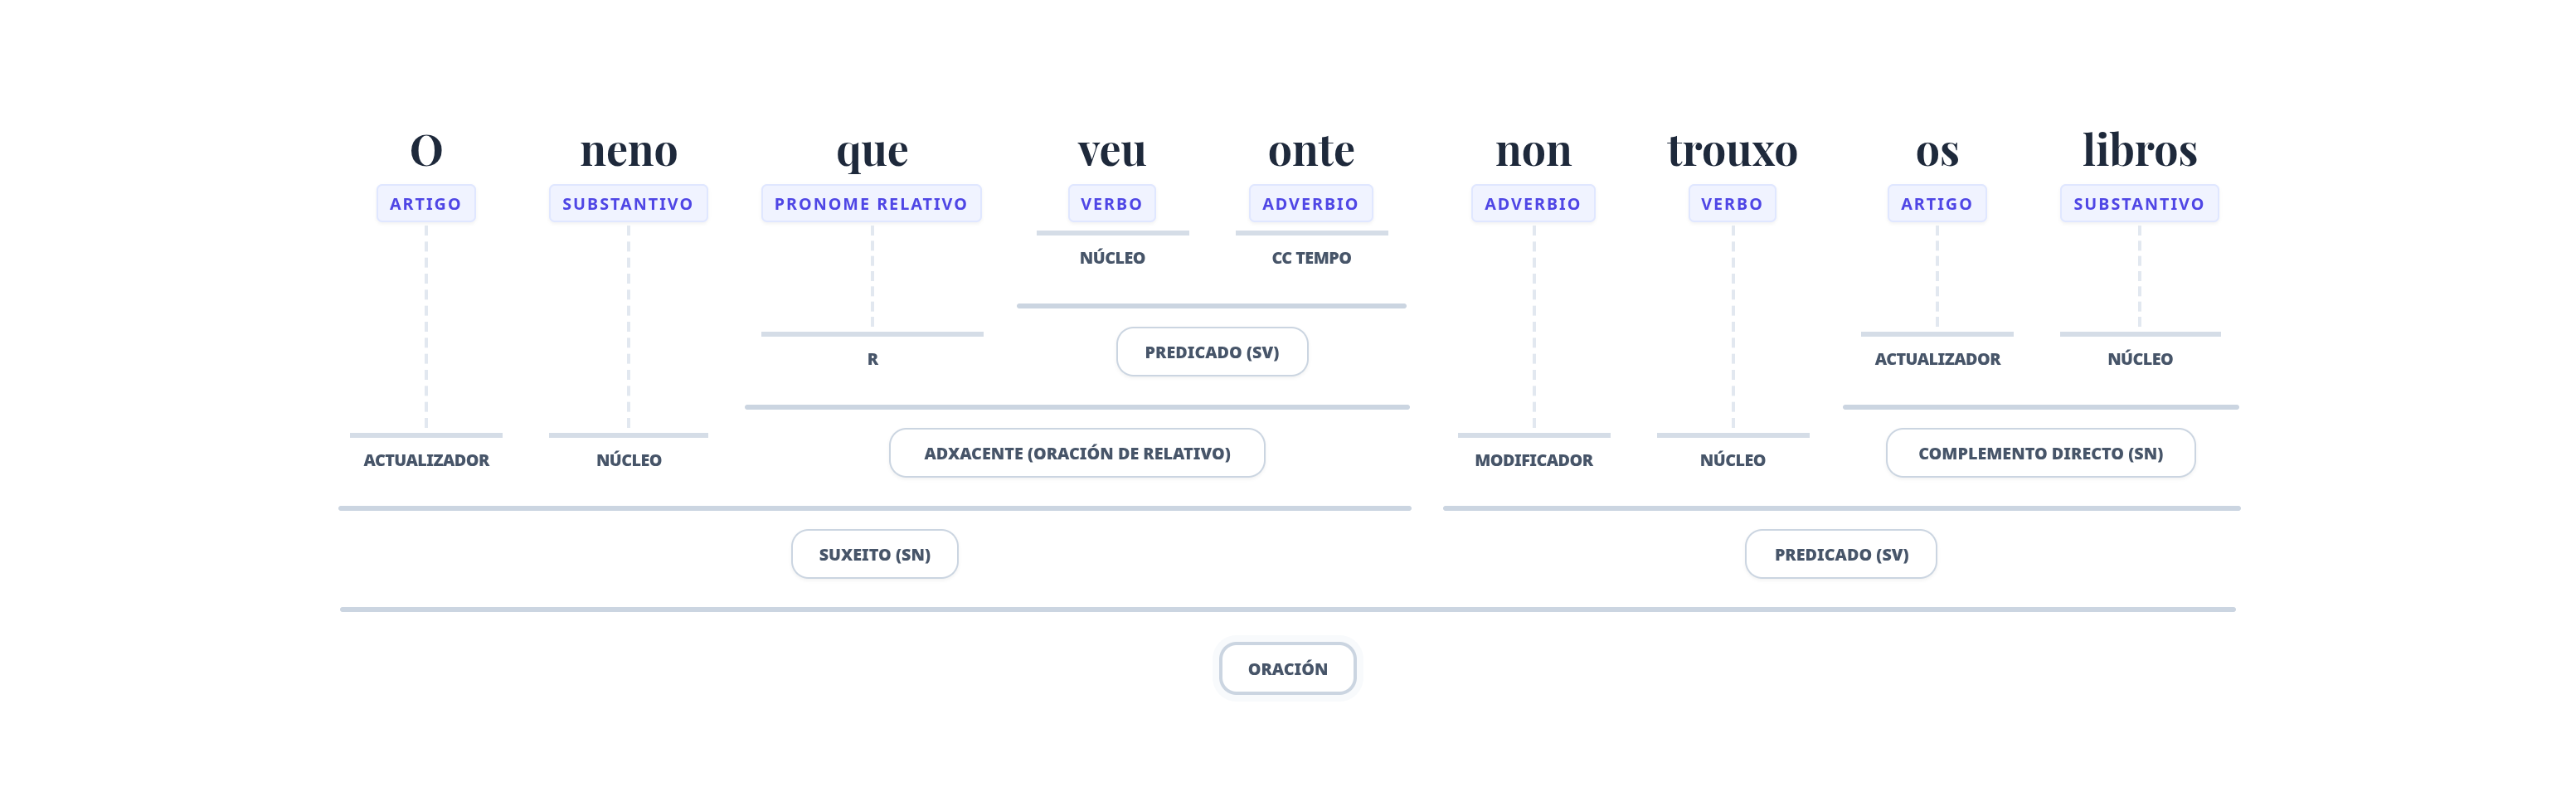
https://morfosintaxe-con-xerador-196779037832.us-west1.run.app
In the following presentation, you can observe the phases that comprise the bonsai method for literal text memorization, utilizing the explanations of Paula and Sara González from @memoriaextrema.
However, sometimes we lack imagination when it comes to creating symbols. While this technique should be an active process, where you yourself create the symbols, on occasion we miss having an AI tool to assist us with symbolization. Here is an example made with Google AI Studio.
PROMPT:
Create a set of small mnemonic drawings with the key words of the following paragraph:
“Faced with the grave crisis and the Germanic threat, in the year 395 Emperor Theodosius divided the Empire into two parts to facilitate its defense: the Western Roman Empire, with its capital in Rome, and the Eastern Roman Empire, with its capital in Constantinople. Each territory had its own emperor and institutions. In the West, the emperors could not stop the invasions, but in the East, the Empire endured for another thousand years, although it came to be known as the Byzantine Empire.”
And this could be the result:

When faced with a comprehensive program like FreeCAD to learn how to draw in two dimensions, it can seem very complex due to the numerous options presented. However, to start drawing, you don’t need so many options, and that is what you will learn in this blog entry.
STEP 1. Installation
Since I typically document for Debian, and this distribution prioritizes stability over innovation, and knowing that FreeCAD has improved significantly from version 1.0 onwards, let’s see how to install the latest version with flatpak packaging.
sudo apt update
sudo apt install flatpak
sudo flatpak install https://dl.flathub.org/repo/appstream/org.freecad.FreeCAD.flatpakref -y
STEP 2. Configure Windows and Keyboard Shortcuts
The following script is designed to customize the flatpak-packaged version of FreeCAD. If you install FreeCAD natively, you will need to modify the destination folder of the user.cfg file.
Download the following file using the keyboard shortcut Ctrl + S to save it:
Give it execution permissions and finally run it:
cd Downloads
chmod +x restaurar_freecad.sh
./restaurar_freecad.sh
Close FreeCAD and reopen it.
STEP 3. Let’s Start Drawing!
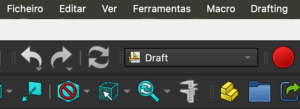
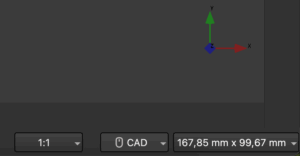
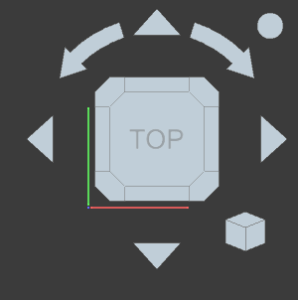
The first thing you should check on the main screen is that you are in Draft mode, CAD, and in top view. Here are the 5 minimal instructions to begin:
INSTRUCTION NO.1. LINE (Key L)
By pressing the letter L on the keyboard, a box appears on the left indicating that we are in line order. To draw:
- Click with the mouse at the starting point.
- For horizontal/vertical lines, hold Shift and enter the length.
- In the left panel, activate the “Relative” option.
To delete lines:
- Select the line and press Delete.
- For multiple lines: Ctrl + E and then Delete.
If the screen turns black, go to: Edit > Preferences > Display > 3D View and enable “MSAA 4x”.
Also, activate coordinate forcing (osnap), for example, endpoint and intersection:
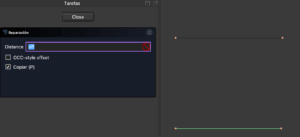
INSTRUCTION NO.2. OFFSET (Key Q)
By pressing Q, you can create a parallel line to another. In the right panel, make sure to have the “Copy” check activated. It may also be named Equidistant.
INSTRUCTION NO.3. TRIM (Key R)
Allows trimming or extending lines:
- Select the line to modify.
- Press R.
- Click on the boundary line.
In Debian, if you want to remove the longer section, press Ctrl + Alt before selecting.
INSTRUCTION NO.4. MOVE (Key D)
To copy already drawn elements:
- Select the lines with Ctrl + E.
- Press D.
- Click on the origin point and then on the destination.
Ensure the “Copy” check is activated.
INSTRUCTION NO.5. ROTATE (Key X)
To rotate a piece:
- Select with the shortcut Ctrl + E.
- Press the “Rotate” button.
- Define two points for the axis, and a third for the new position.
Uncheck the “Copy” if you don’t want to duplicate the piece.
There are many more instructions, but the goal of this guide is to start drawing without information overload. Once you master these tools, you can add more resources like blocks, layers, polylines, dimensions, etc.
Anki is a powerful learning tool based on flashcards that uses the spaced repetition system to optimize long-term memorization. You can install it on GNU/Linux, Windows, and macOS.
—
1. Installing Anki
As you know, I always document for the latest Debian version, which is version 13 in this case. In this version, the standard installation method does not work, likely due to a compatibility issue with Wayland. Fortunately, you can install the program using a Flatpak package. Let’s see the process.
Install the Flatpak installation manager if you haven’t already:
sudo apt update
sudo apt install flatpak
Next, proceed with the installation of Anki:
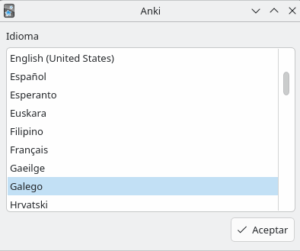
sudo flatpak install https://dl.flathub.org/repo/appstream/net.ankiweb.Anki.flatpakrefWhen you start the program, you will need to choose the interface language:
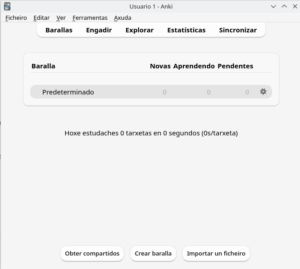
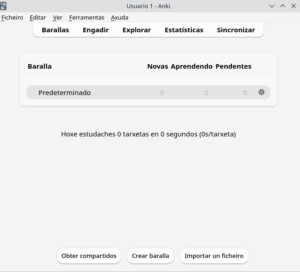
And now you have it available. Leave it open for a moment, as we’ll come back to it for importing the questions:
—
2. Create a Notebook and Add Sources to NotebookLM
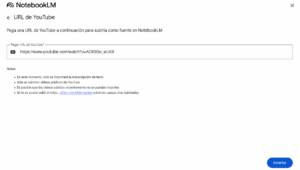
a. Enter NotebookLM, using your Google account credentials, and create a notebook:
https://notebooklm.google.com/
In this example, as a source of information for the notebook, we add the RTVE documentary, in which he studies “La Celestina”:
'https://www.youtube.com/watch?v=ADKBSo_wUK8'
—
3. Prompt to Add to NotebookLM
While NotebookLM already has a card generator and viewer (which is very interesting), we suggest using Anki. Anki not only presents the cards randomly but also focuses on the questions the user has not mastered while relaxing the concepts already acquired, thus optimizing study.
To do this, once you have added the source to NotebookLM, proceed to paste the following prompt to obtain the questions and answers for the study cards:
Act as an assistant specializing in creating Anki flashcards from the input material.

Instructions (Summary):
Apply the Principle of Atomicity: Formulate questions that require only one central idea or specific data as a response. Avoid lengthy paragraph answers.

Integrity and Self-Sufficiency: Ensure each card makes sense on its own. If the material is schematic, complete the answer with fundamental and concise additional information for total comprehension.

Completeness: Ensure each card is self-sufficient, adding concise information if the material is very schematic.

Flow: Maintain the logical sequence of the material.

Typology: Use Question | Answer or, for lists and phrases, Sentence with {{Blank}} | Context (Cloze Deletion).

Strict Output Format:
Structure: One card per line. Do not include introductions or titles.

Separator: | (vertical bar) separates Question and Answer. If the original text contains |, replace it with | in the answer.

Format:
Bold: <b> and Italics: <i>.
Lists: Use <br> for internal line breaks in the answer.
Math: \( ... \) (inline) and \[ ... \] (block).
Chemistry: \ce{...} (MathJax).

Result (only the cards in Spanish):
—
4. Prepare a TXT File with the Result
Copy the result to the clipboard (Ctrl + C) and open any plain text program you have installed (Kate, Gedit, Mousepad, Notepad, etc.). Paste the content (Ctrl + V) and save it as **Celestina.txt**, for example.

—
5. Import the Questions to Anki
Open the Anki program again. Click on the Decks section and then on “Create Deck,” naming it “La Celestina.”
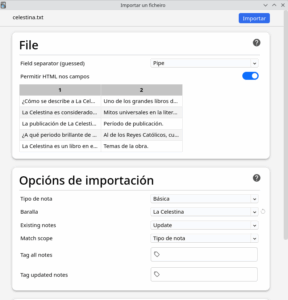
In the same section, click on “Import File.” Keep the default options, except in the Deck section, where you will choose “La Celestina.” Finally, click the “Import” button.
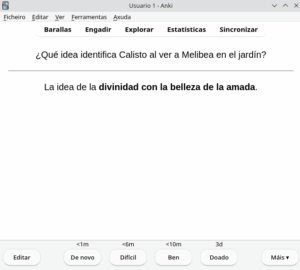
Close the confirmation window to return to the main Anki program. Click on the deck “La Celestina” and then on the “Study Now” button.

The questions about the video will start to appear. The user reads the question and answers mentally. Then, click the “Show Answer” button and choose one of the options:
- “Again“: To ask again in less than 1 minute (concept not mastered).
- “Hard“: In less than 6 minutes.
- “Good“: In less than 10 minutes.
- “Easy“: To ask again after 4 days (concept mastered).
You will now need to explore the options for editing or deleting poorly formulated questions, adding audio notes, etc. Undoubtedly, Anki is a very interesting tool for students.
yt-dlp is a very useful command-line tool for any educator looking to manage multimedia content from various platforms. Let’s see how to install it on the system and a couple of practical examples.
Installation of yt-dlp
The following guide is specific to Debian-based systems (such as Ubuntu or Debian itself):
1. Download the executable
We can directly download the latest version of the executable from its GitHub repository. To do this via the terminal:
cd ~/Downloads
wget https://github.com/yt-dlp/yt-dlp/releases/latest/download/yt-dlp
2. Preparation and copy to the system
To make the system recognize it as an instruction (command) accessible from anywhere, we must give it execution permissions and copy it to a directory in the $PATH, such as /usr/local/bin.
# Access as a superuser
su root

# Give execution permissions to the downloaded file
chmod +x ~/Downloads/yt-dlp

# Copy the executable to the command directory
cp ~/Downloads/yt-dlp /usr/local/bin/

# Return to your regular user
exit
3. Verification
You can now call the tool from your user, simply by typing yt-dlp in the terminal.
Examples of use with yt-dlp
1. Obtain a list of video URLs from a channel
If you want to import a set of videos from a YouTube channel to a tool like NotebookLM (or any other that accepts URL lists), you can extract the addresses:
yt-dlp --flat-playlist --get-url "https://www.youtube.com/@HRom/videos"
With the command, you will display all the URLs from the channel, such as:
'https://www.youtube.com/watch?v=AVPAGFTchw0'
'https://www.youtube.com/watch?v=OuQZhYCa_uk'
'https://www.youtube.com/watch?v=tQvuIRNOg54'
'https://www.youtube.com/watch?v=rFYxR6PmJBQ'
... (and so on to have the complete list)
For NotebookLM:
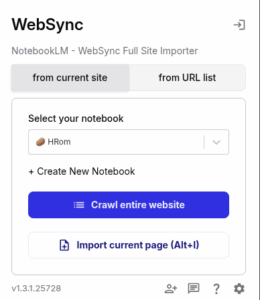
You then insert these URLs into NotebookLM. To avoid inserting them one by one, you can use the following extension for Google Chrome: WebSync – Full Site Importer. Therefore, install the extension.
3. Open NotebookLM and create a new notebook. For this, you can insert the first URL of the videos. You can name the notebook HRom, for example.
https://notebooklm.google.com/
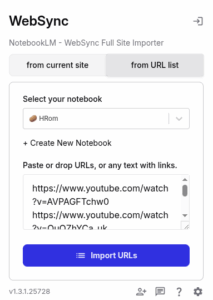
Once the notebook is created, click on the WebSync – Full Site Importer extension and select the HRom notebook.
Next, click on the “from URL list” tab and paste the list of URLs, adding up to 50 in each of the notebooks, obtained in step 1. Click on the “Import URLs” button.
2. Download only the music (audio) from a video
Sometimes, you might need background music without lyrics (like karaoke tracks or instrumentals) to add to your educational videos. You can extract only the audio in MP3 format with the best available quality:
yt-dlp -x --audio-format mp3 --audio-quality 0 -o a-ha.mp3 https://www.youtube.com/watch?v=dQjvXX3oSw8;
Once downloaded, you can import the audio file into your preferred video editor.
On occasion, when installing some Debian images, the language selection may not work correctly. Choosing the Galician language (gl_ES.UTF-8), the system might start in English with all the folders also in English instead of in Galician. Here’s how to fix this so that the desired language appears:
sudo apt install locales

sudo dpkg-reconfigure locales

sudo reboot

sudo locale-gen gl_ES.UTF-8

sudo localectl set-locale LANG=gl_ES.UTF-8
Exit root and switch to the user you regularly use. From there, reconfigure the folder names in /home/user:
xdg-user-dirs-update --force
In case you are using the Plasma desktop, this may still not resolve the issue. To fix this, edit the following file for each user you employ:
nano ~/.config/plasma-localerc
It should look like this:
[Formats]
LANG=gl_ES.UTF-8
To synchronize the time:
sudo apt install systemd-timesyncd
Check that the service is active:
sudo timedatectl status
AI for video editing is advancing rapidly. A very interesting experience is the historical recreation of the village of Laxe from 1910 to 1960, during the dictatorship, carried out by
When the standard installation procedure defined in the program manual https://wordpress.piztu.org/manual-do-aplicativo-piztu/ fails, we proceed with this alternative approach:
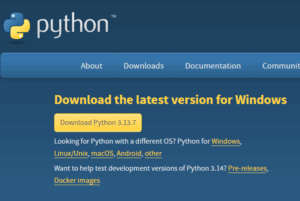
1. Download Python
a. Go to the Python website: https://www.python.org/
b. Download the latest available version of Python. At the time of writing, it’s version 3.13.7.
2. Install Python

a. Check both boxes: “Use admin privileges when installing py.exe” and “Add python.exe to PATH”
b. Click “Customize installation”
In the next window, keep all the default options, so you just need to click the “Next” button
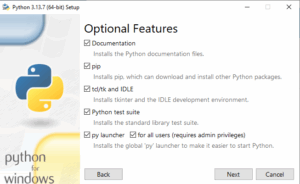
On the next screen, select “Install 3.13 for all users” and “Download debugging symbols,” keeping the 4 default options selected. Finally, click “Install”

Once the installation is completed, verify that both Python and PIP are installed. Open a terminal (Windows + R and type cmd)
python –version
(the system will respond with Python 3.13.7)
pip –version
(the system will respond with pip 25.2 from C:\Program Files\Python313\Lib\site-packages\pip (python 3.13)
3. Manually open port 8000
Since the Zettlr API communicates with the internal HTTP through port 8000, we will need to open it. On some devices this process is done automatically, while on others it’s not, so we will manually open it:
a. Press the Windows + S key combination and type “Firewall”, then select “Windows Defender Firewall with Advanced Security”
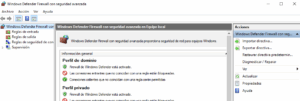
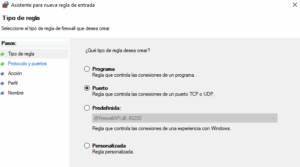
b. In the Firewall window on the left panel, click on Inbound Rules. Then in the right panel select New Rule. Choose port and click next.
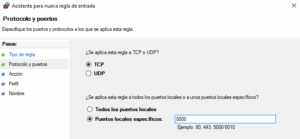
 Select TCP and write 8000 in the Specific local ports field
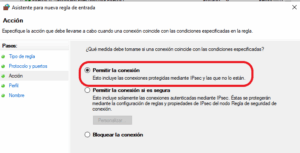
And enter a name, for example, Zettlr_8000. Repeat the process in Outbound Rules.
4. Install the version 25.8.2 of Zettlr, which can be done for both your user account and all computer users without needing to do anything specific beyond clicking next. If a popup window appears indicating that Python wants to make changes to your device, press the Yes button. Once the installation and startup are complete, each time you open the program, it will ask the same question, but you should respond with No (it needs to be adjusted in the programming so that before asking this question, it verifies if it meets the working conditions and therefore has port 8000 open).
5. In the Zettlr application, press the 0.Register_and_download button. First, register by entering your Name, Surname, your email (which will be the username when registering), and the password. Then log in with the email and password and finally press 3. Download scripts and install.
Topgrade is a powerful tool that simplifies the update of all your system software with a single command. It updates the operating system, Snap packages, Flatpak, containers, Python libraries, and much more. Below is a clear and optimized guide to installing and configuring Topgrade on Debian/Ubuntu-based systems, ensuring an efficient and secure process.

https://github.com/r-darwish/topgrade
Prerequisites
Before starting, make sure you have administrator privileges and a stable internet connection. Additionally, you need to install Rust since Topgrade is written in this language.
Step 1: Install Rust
-
Update the system and install the necessary dependencies:
sudo apt update sudo apt install -y curl build-essential pkg-config libssl-dev -
Download and install Rust using the official script:
curl --proto '=https' --tlsv1.2 -sSf https://sh.rustup.rs | sh -
Add the Cargo directory to the PATH for the root user:
echo 'export PATH="$HOME/.cargo/bin:$PATH"' >> ~/.profile source ~/.profile -
Verify the installation of Rust and Cargo:
rustc --version
cargo --version
Step 2: Install Topgrade
-
Install Topgrade using Cargo:
sudo cargo install topgrade -
Install additional necessary dependencies:
sudo cargo install cargo-update
Step 3: Run Topgrade
To update the entire system, execute:
topgradeNote: It is recommended to run Topgrade with root privileges to ensure that all system components are updated correctly.
Step 4: Configure Automatic Updates
To automate updates every 60 minutes, create a systemd service and timer.
-
Create the Topgrade service:
sudo nano /etc/systemd/system/topgrade.serviceAdd the following content:
[Unit] Description=Run Topgrade to update the system After=network-online.target [Service] Type=oneshot ExecStart=/root/.cargo/bin/topgrade -y [Install] WantedBy=multi-user.target -
Create the timer:
sudo nano /etc/systemd/system/topgrade.timerAdd the following content:
[Unit] Description=Timer to run Topgrade every 60 minutes [Timer] OnBootSec=10min OnUnitActiveSec=60min Persistent=true [Install] WantedBy=timers.target -
Enable and start the timer:
sudo systemctl daemon-reload
sudo systemctl enable topgrade.service
sudo systemctl enable topgrade.timer
sudo systemctl start topgrade.timer
-
Security: Running Topgrade with root privileges is necessary to update all system components, but always review updates to avoid unwanted changes.
With Topgrade, keeping your system updated is easier than ever. Automate your updates and enjoy efficient software management!
One of the most frequent tasks for teachers is keeping families informed. While sometimes a longer and more detailed email is necessary, often a brief message via Abalar mobile suffices. The challenge is to condense official information—like the school calendar, meetings, or last-minute notices—into a few lines without losing clarity. Writing it by hand can be time-consuming, finding the right words, checking for errors, or repeating the message until it’s suitable.

This is where it is very useful to turn to artificial intelligence tools like Perplexity. Simply provide the source of the information (for example, the school calendar published by Xunta de Galicia) and request it to generate a communication designed to be sent via Abalar mobile. In seconds, you receive a clear, concise proposal ready to send or review.
The advantage is clear: time is saved, errors are avoided, and a well-structured message reaches the family in the simplest way possible. The teacher still maintains control but starts from a draft that makes the task easier.
Below is an example of how to communicate the 2025/2026 school calendar to families through Abalar mobile:
The 2025/26 school year begins on September 10, 2025 and ends on June 22, 2026.
Christmas holidays: from December 22 to January 7.
Easter holidays: from April 2 to April 13.
The school will inform later on about the non-teaching days at its discretion.
With this kind of support, AI becomes a tangible tool for improving school communication: less time drafting, clearer messages, and better-informed families.
Each teacher needs specific tools for classroom management, as each class is different, and teaching practices change over time. Piztu attempts to address this need by providing a driving engine to which any teacher can adapt the working apparatus they require. Let’s take a look at an example!
Imagine a teacher who needs a text correction system that allows us to preview applications during evaluation, for instance. We can ask an AI to take a script (like the one used in button 11, “Editor AI”), modify it, so that it loads the text of an active note, corrects it, and saves it in the same note, replacing the original. We could ask it to do anything else, but let’s continue with the example:
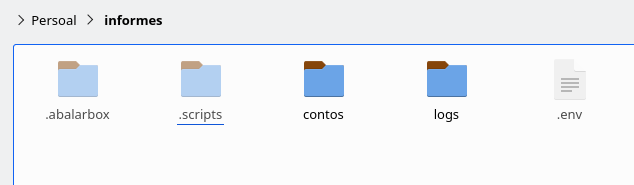
- We open an AI, for example, https://grok.com, and upload script 11, which is in the working folder, within the subfolder .scripts. In my case, I named the working folder “reports”, and it’s in the path /home/user/reports (if you use Windows, the explanation is the same). Remember that the .scripts folder is hidden, and to view it, you must press the Ctrl+H key combination or go to the menu and choose the “Show hidden files” option.
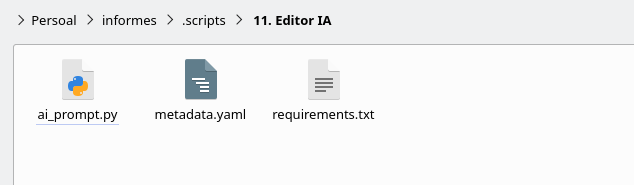
If we open the .scripts subfolder and then the 11. Editor IA folder, we’ll provide the artificial intelligence with the ai_prompt.py file.
In the artificial intelligence prompt, we’ll indicate what we wish. For example, the following, which can, of course, be improved:
“I want to create a new script, and possibly the ai_prompt.py file can help us. I wish to make a change in the interface: in the first column, replace the ‘AI Result’ box with ‘Active Note Content’. Specifically, I want the script to load the content of the active note into this new box. In the same column, at the bottom, keep the prompt, but with an editable default prompt. The default prompt would be: ‘Correct the text grammatically, orthographically, and lexically in Galician, of the content that appears in the “Active Note Content” text box’. In the right column, I want the ‘AI Result’ box to appear, showing the corrected text result. The rest of the options and functionalities should remain. Therefore, the functionality of the new script, which we will call corrixe.py, is to load the content of the active note, correct it, and display it, with the option of auto-saving the active note with the corrections.”
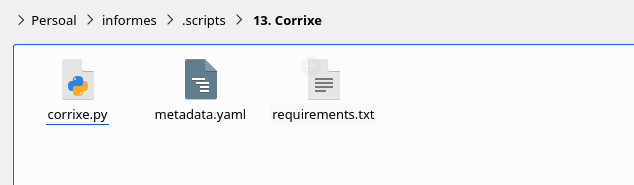
Create a new subfolder in the folder with the name you desire, for example, 13. Corrixe, and within it, save the three files provided by the AI.
Additionally, we’ll ask it to generate the requirements.txt and metadata.yaml files (for the latter, we can provide a premade example to maintain the format).
https://drive.google.com/file/d/1h5oRhiPn45zI4SjI4UtrCid-kMvLvNhB/view?usp=sharing
It’s important to note that each time you execute “Register and download”, you will delete all information from the .scripts folder. Therefore, every time you create a script, you should save it in a safe place. Additionally, it’s recommended to periodically download the scripts using the “Register and download” procedure to benefit from improvements and bug fixes.
5. And it should automatically appear in the right column of Zettlr, thanks to the api service.
6. To test the script, I asked it to create a 200-word story in Galician with spelling, grammar, or lexical errors:
Once upon a time, there was a very small boy named Xosé. He had a dog, which was very ugly, but he loved him very much. One day, he was walking with a friend, who was also named Xosé, on the street. Suddenly, they saw a cat eating a fish. Xosé’s dog, which was very smart, ran towards it and started barking. The cat, which wasn’t afraid of anything, said: “Oh, how well you get along, come with me, and we’ll be friends.” The kids, very happy, said: “We are not kids, we are children”. The cat, with a face as if he didn’t know anything, replied: “I don’t care, the point is we are friends.” And then, the cat, the two kids, and the very ugly dog went to their house to play. They were very happy because they took great care of each other, and Xosé, the boy, said that his dog was very “handsome”, despite being ugly. The end.
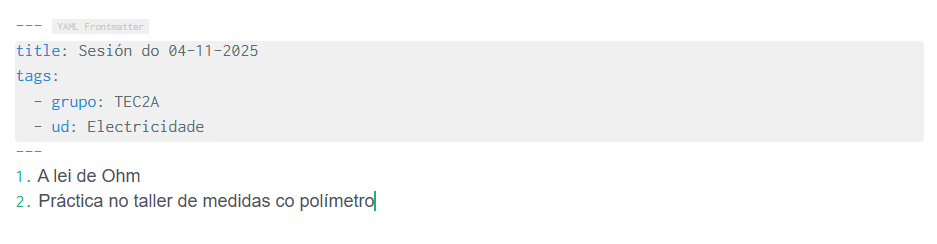
7. Once created, create a new note where you paste the previous text. Save. 8. Open the new script, adjust the prompt to your preferences, and correct the text, being able to save it in the active note replacing the previous version.

As you can see, it’s easy to adjust a script to your way of working, and the functionalities that can be provided to Piztu are indeed countless. It would be great if you shared your scripts with your colleagues so that they, in turn, modify them, improve them, and share them again. To do this, you can use the Telegram channel: https://t.me/+VNJJ-F91EDNiYzhk.
This is the magic of free software 😉
For those concerned about their data privacy, it is possible to install artificial intelligence (AI) locally, preventing the sending of information to external servers. A notable option is Jan, an open-source tool that serves as an alternative to ChatGPT and operates 100% offline. Specifically, the model Jan V1, based on the Qwen3-4B-thinking model, has a compact size of only 2.1 GB, which is surprising for its efficient performance on devices with limited resources.
Jan allows the execution of local language models (LLMs) such as Llama, Gemma, Mistral, or Qwen, directly on your computer or mobile device, ensuring that your data doesn’t leave your machine. Additionally, it offers the capability to connect to remote APIs such as Groq or OpenRouter if you require additional functionalities, always maintaining control over your information.
Teachers need a quick tool, more than a high-performance one, for managing daily tasks. For instance, to publish daily notes from the class diary, such as the content of the materials covered, assigned homework, notes on materials to purchase, or modifications needed. Ideally, this should be done right after class, during those transition minutes between groups or during break time.
However, it is very practical to use a mobile phone and dictate notes orally, avoiding the need to turn on the computer, open programs, etc. (although this can obviously be done that way too). Zettlr, however, does not have a version for Android or iOS. The good news is that we can use Obsidian, a tool that is compatible with the Markdown note-taking system and, therefore, with Zettlr.
The first step on the mobile device is to create a folder. For example, you can use the same name as the workspace used on the computer. Then, install the program Syncthing both on the computer (or computers) and the mobile device (there is no version of Syncthing for iOS, so an alternative needs to be found). This way, the folders and notes sync automatically, reflecting everything on the mobile device from the computer and vice versa.

Next, install Obsidian on the Android device and select the synchronized folder with the computer as the vault (equivalent to the workspace of Zettlr). You can now create folders and notes in written form. Additionally, Obsidian allows the use of a microphone to transcribe everything you dictate into text. If you speak in Galician, make sure to set the keyboard in the settings to recognize the Galician language and transcribe correctly.